If you are one of those progressive companies that can see the monumental benefits that Facebook can deliver to your local, national or international business, then you will know what a Facebook Pixel is. If you don't know what a Facebook Pixel, don't be alarmed! Read my post on "What's all the fuss with this Facebook Pixel!". But most companies with a website still don't install the pixel correctly or at all. Luckily for you, Facebook still develops handy tools to make the process of verifying and troubleshooting the pixel nice and smooth!
It's called The Facebook Pixel Helper.
Using this handy tool you can
Installing The Facebook Pixel Helper
1. To use the Facebook Pixel Helper first make sure you have the Chrome web browser installed on your computer.
2. Next, using the Chrome browser install the Pixel Helper from the Chrome Store. Follow the instructions on the Chrome store to install the extension in your browser.
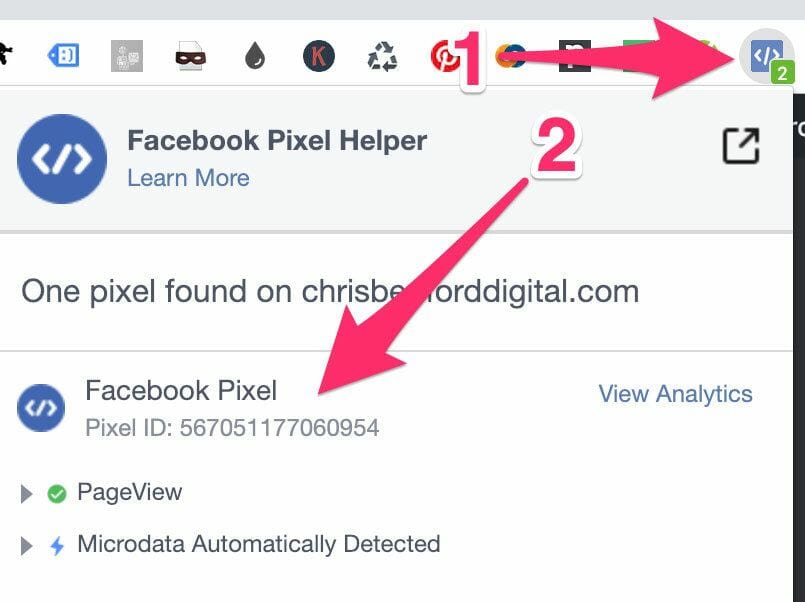
3. Follow the instructions on the Chrome store to install the extension in your browser. Once the Pixel Helper is installed a small icon </> will appear next to your address bar. If the icon is blue then the pixel is installed on the website that you're currently viewing. If its greyed out that means there is no pixel installed on the current website your viewing.

Verifying Pixel Implementation
1. First, install the Facebook Pixel Helper Chrome Extension. After installation, navigate to your website in your Chrome browser, and click on the Pixel Helper icon.

2. The popup will tell what pixels were found on the page, and whether they have loaded successfully. If your pixel(s) loaded successfully, it's time to start running ads with them.
Over to you
I hope this post inspires you to get the pixel helper chrome extension installed on your browser to test your websites pixel is functional and working correctly. If you have any questions or you encounter difficulties when trying to implement these steps, let me know by leaving a comment!

